
Inhaltsverzeichnis
- The first 90 days
- The value gap
- It starts with the why and the who
- Step-by-step guide to building onboarding guides in Pendo
- Step 1: Getting started with onboarding guides
- Step 2: Guide layout
- Step 3: Building guide content
- Step 4: Guide activation
- Step 5: Guide segmentation
- Step 6: Guide publishing
- What comes next
In a rush?
Download the PDF for later
The first 90 days
Pendo’s interactive benchmarks study highlighted product engagement trends across over 1,000 products. One engagement metric, app retention, measures how many users continue using an application during a given period of time. In the case of our study, app retention reflects the percentage of users retained in the first three months of usage.
Early product engagement is a critical indicator of long term customer health, so it’s essential to help users find value in your product as early as possible. With only 30% of users exhibiting regular usage in their first 90 days according to our study, the importance of the initial user experience is clearer than ever.
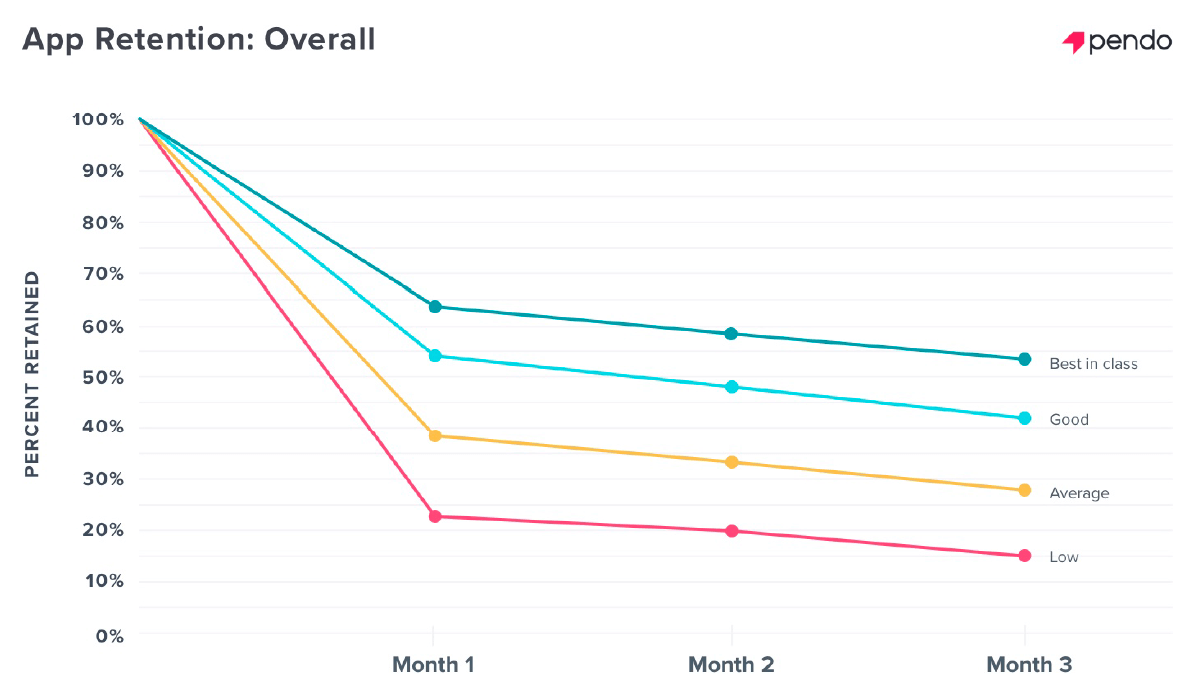
This usage dip forces product and customer success teams to ask what’s causing it and, more importantly, what can be done about it.
The value gap
This drop-off in engagement in the first 90 days results from the “value gap” when perceived value and experienced value don’t overlap. Most often, the key challenge isn’t that customers are incapable or the product is lacking, but rather that there’s an education gap keeping customers from finding value in the app.
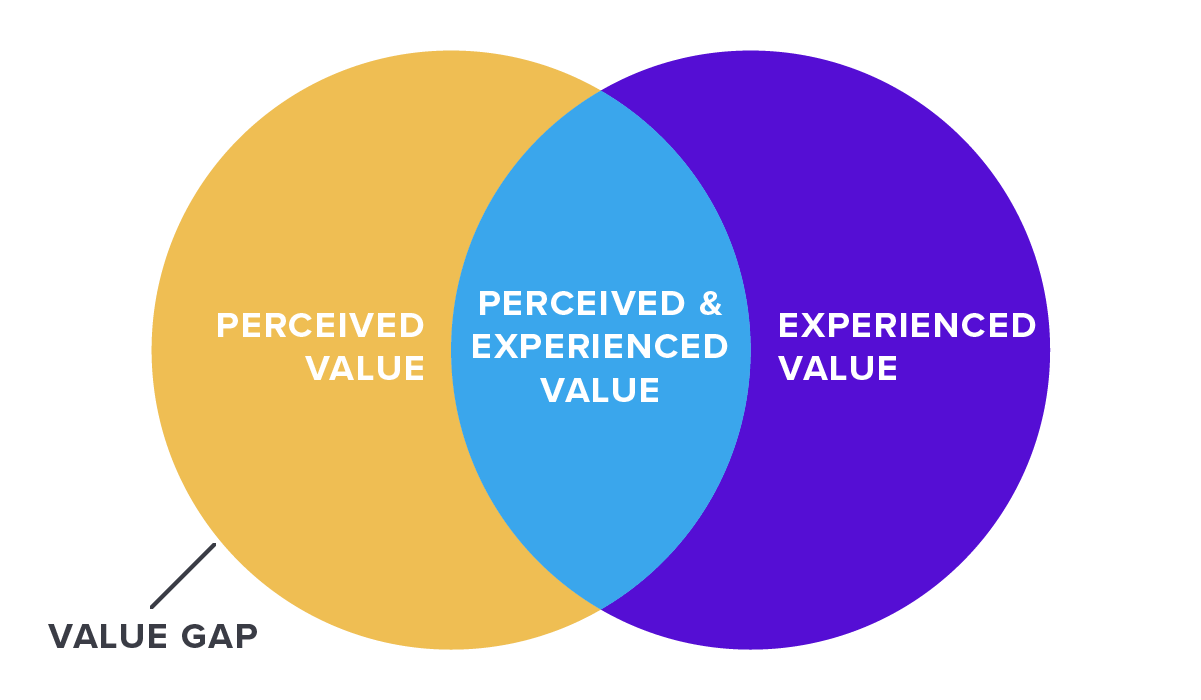
Bridging the value gap relies on an effective onboarding experience that guides users to the value they anticipate in the time they expect. Historically, product onboarding has been achieved three different ways:
1. Self-discovery: This approach lets the customer explore and discover the product on their own without guidance. While this may work for certain users, this approach increases the risk that users may not find that “a-ha” moment or achieve that first quick win.
2. Human assisted: This method relies on in-person product training sessions, email drip campaigns, or external help documentation to guide users through the product. While this approach provides detailed support, these methods may be more time-intensive or require significant technical overhead. It’s also important to do these sessions close to when a user is actually accessing the product to ensure the training feels relevant and information is retained.
3. Automated in-app: Quickly becoming an industry best practice, this strategy provides in-app onboarding walkthroughs and tutorials. In-app guidance provides just-in-time support, can be customized, and helps accelerate time to value for the customer. It, however, shifts some of the overhead and time requirements to the team building the product.
Creating an in-app onboarding experience requires thoughtful planning and periods of iteration and experimentation. When done effectively, though, integrating user onboarding into your product can become one of the biggest drivers of user satisfaction, retention, and business growth.
Pendo provides code-free in-app onboarding to help users capitalize on the benefits of in-product onboarding while not taking critical time away from development teams. We’ve surveyed some of our most successful customers to help you get started.
It starts with the why and the who
Before you start building an onboarding walkthrough, you’ll want to get clarity on a few questions that can inform the structure and content of your onboarding. First, you should have a clear perspective on the goal your onboarding flow is trying to achieve.
Some example goals include:
- Increase awareness and adoption of key features
- Increase conversion from freemium and product trial experiences
- Increase adoption of internal tools
Your goal should inform which features you choose to highlight in your onboarding walkthroughs and whether you want the information to be presented in a passive or proactive way.
Next, you’ll want to assess the group of users receiving the message. Consider the following questions:
- What is their goal in your product? Let this inform which features and functionality you choose to highlight in your onboarding walkthrough.
- What is their technical proficiency? This will help you decide how much detail you provide in the content.
- What is their format preference? Depending on the preference of your users, you may want to choose different communication formats (such as gifs or video) rather than relying solely on written content.
- How do they like to learn? Different messaging layouts require different types of engagement. For example, a required onboarding walkthrough requires more user attention than a small tooltip that is activated via a mouse hover. Having a hypothesis on whether your users prefer a more proactive or reactive engagement approach will help inform your in-app onboarding strategy.
KUNDENERFOLG
![]()
“Customer success is dependent on confident and competent end users achieving the goals and vision of stakeholders. Steering the user journey towards those goals is how we set up success in our onboarding experience.” – Adam Siegel, CareCloud
Once you and your team have outlined your approach to why and who, you’ll be ready to build out your onboarding guides in Pendo.
Step-by-step guide to building onboarding guides in Pendo
Step 1: Getting started with onboarding guides
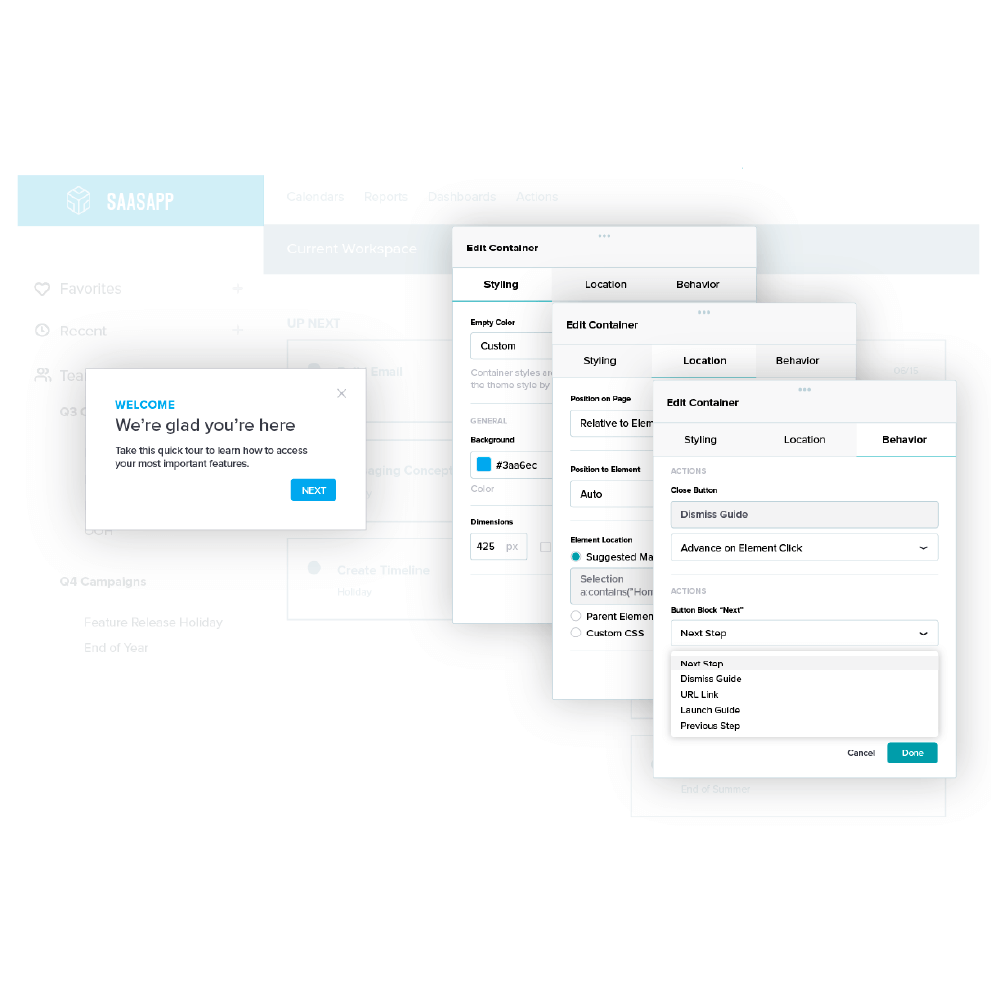
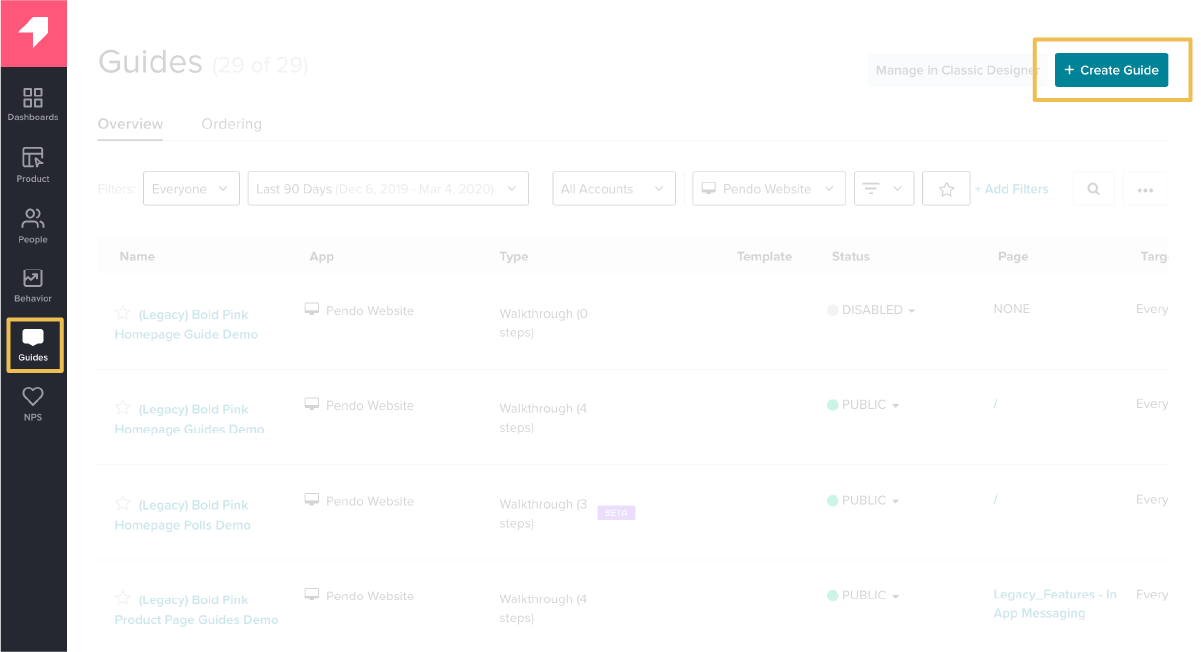
Navigate to the create guide page within Pendo
Guides can be built starting from the “Guides” tab of the application.
Step 2: Guide layout
Select a guide layout
Potential layouts include tooltips, lightboxes, banners, and multi-step guides, and your selection should be informed by what you’re trying to achieve with the guide.
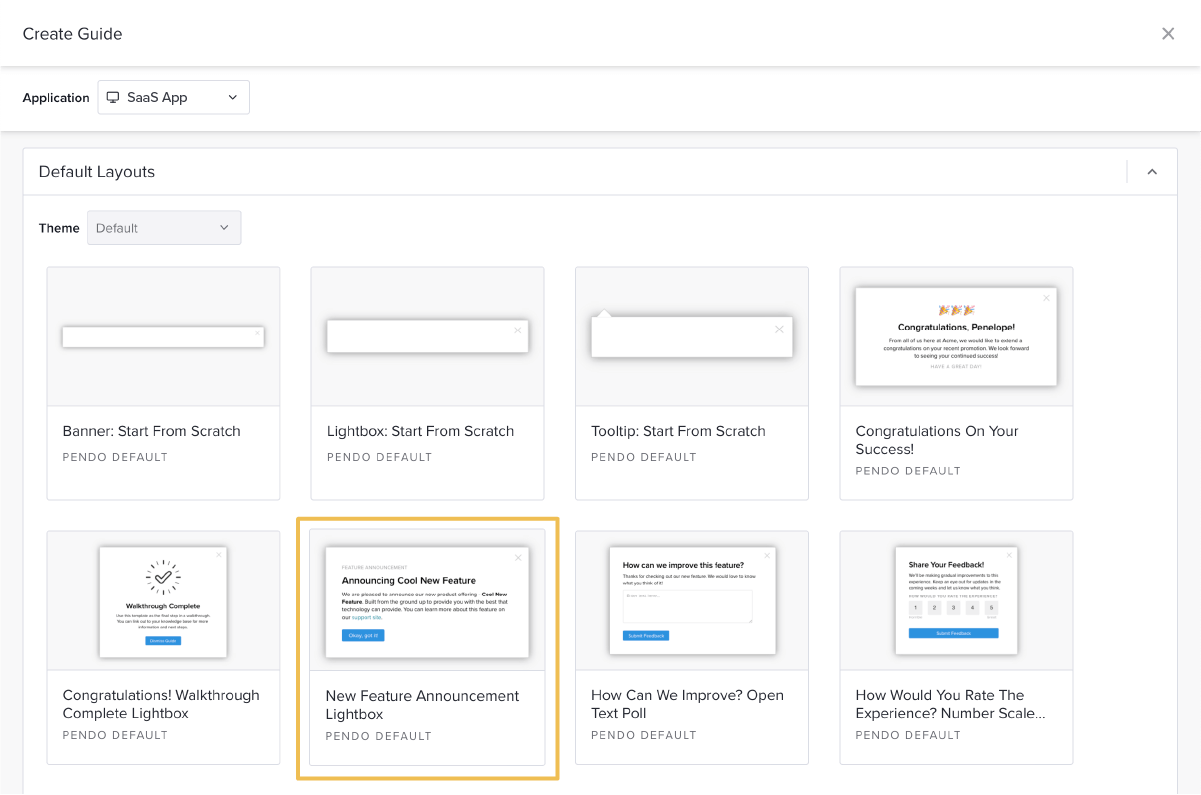
Remember that the best onboarding experiences are comprised of multiple guides, and these layouts are most powerfully used in conjunction with one another. By combining passive tooltips with more active multi-step walkthroughs or lightboxes, you can empower the user to discover information in a manner that works best for them. This multi-faceted approach also helps ensure users have the information they need when and where they need it most, leading to decreased confusion and support tickets.
PRO TIP
Accelerate the creation of new guides by creating layout templates for your most common guide types.
Step 3: Building guide content
Build out the content and associated anchor elements for each step of your guide
This step is where the majority of the work takes place. Prior to completing this step, you’ll want to have a perspective on which features or elements you’d like to highlight in your onboarding walkthrough. When you’re first getting started, it can be helpful to provide a navigation overview so users know where to find core features and can better understand how to use each section of the application.
At first, deciding which features to highlight will be primarily based on hypotheses and what you’ve come to learn about your users to this point. As you become more advanced, you can analyze feature usage and correlate customer outcomes to better understand which features will result in higher satisfaction and retention. One benefit of in-app onboarding with Pendo is that you can quickly iterate and test as you learn more about which guides are most successful.
KUNDEN-STORY
![]()
Insightly, a CRM for small and medium-sized businesses, introduced onboarding for their free trial users. Insightly used analytics to better understand which features were most correlated with conversion. After adjusting their onboarding walkthroughs according to their findings, they were able to triple trial conversions.
In order to start building out your guide, you’ll first see the guide overview page.
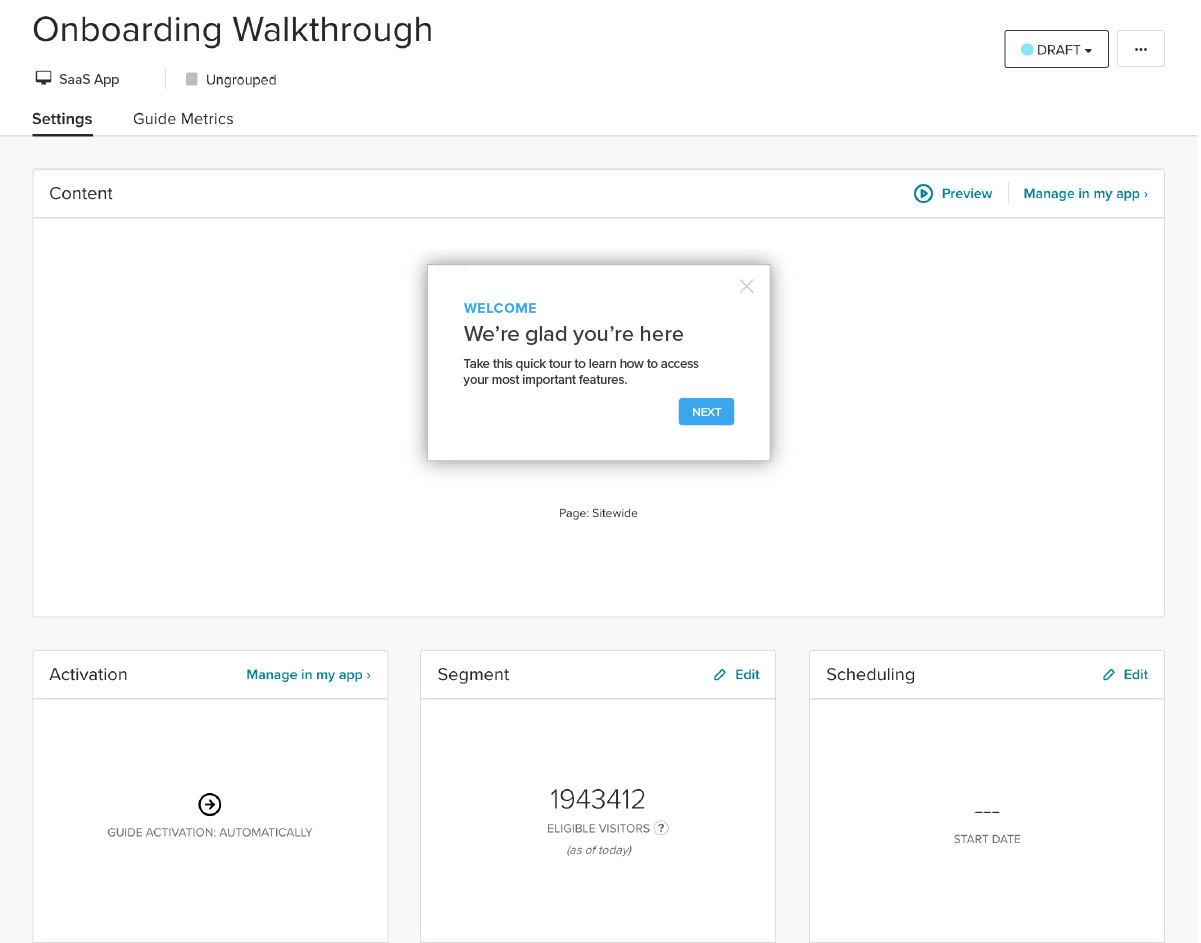
While you can edit certain aspects of the guide on this page, it is often easier to manage and edit the guide in your application to allow you to fully visualize the end product.
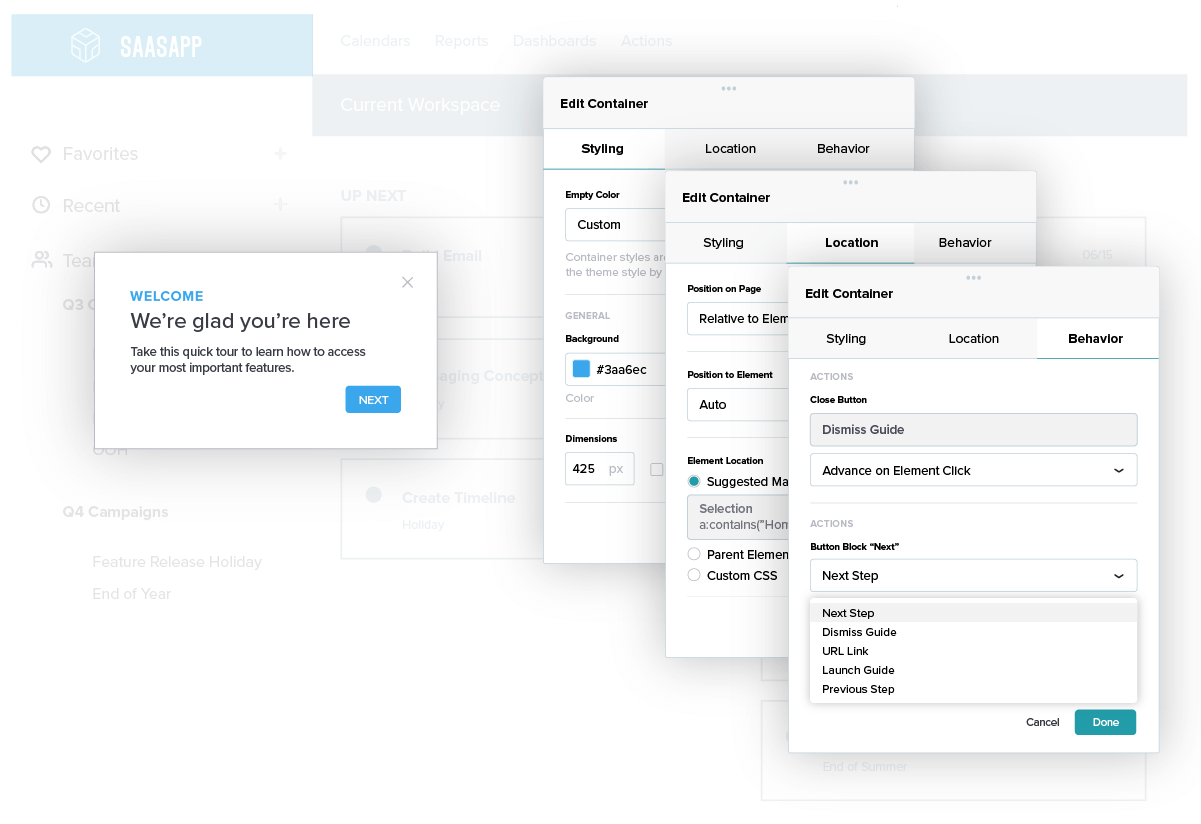
Once you’ve launched the Visual Design Studio in your application, you can easily tag the page element or feature you want to anchor your guide to and adjust the styling to be more consistent with your application. Within this page, you can also adjust text on the guide, add buttons, call to actions, or potentially insert an image or video. Finally, you can adjust what actions will occur once the buttons on the guide are clicked.
PRO TIP
Put yourself in the onboarding flow with your customer by using language like “Let’s” and “We” and providing clear directions to encourage behavior: “Let’s start by entering a contact together. Her name is Ana.”
Continue to repeat steps two and three for every step in your walkthrough.
Step 4: Guide activation
Choose an activation method
Once the content of your guide is complete, determine how you want the guide activated.
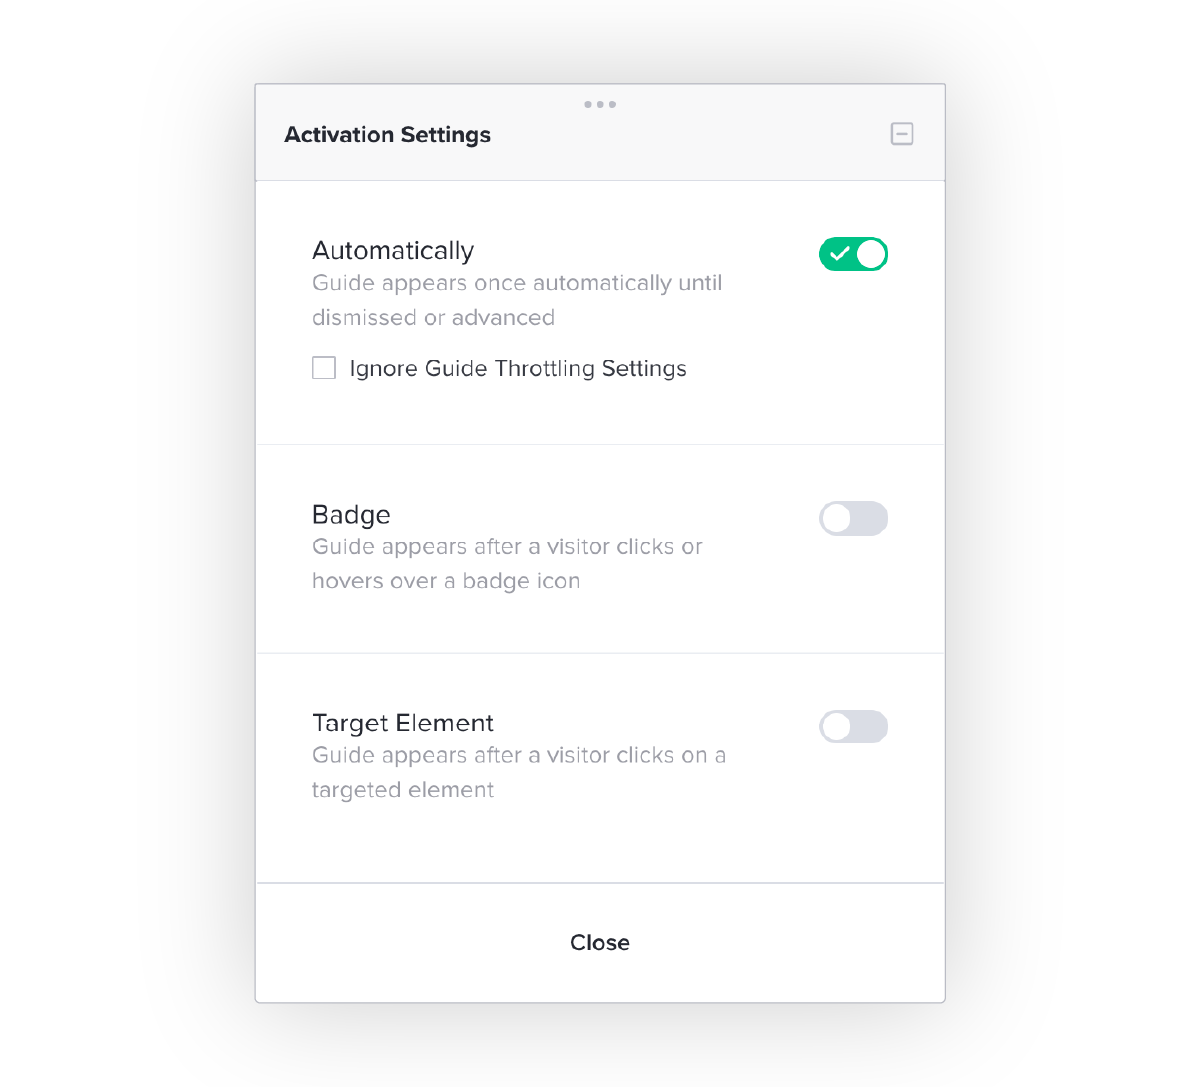
There are three options for activation:
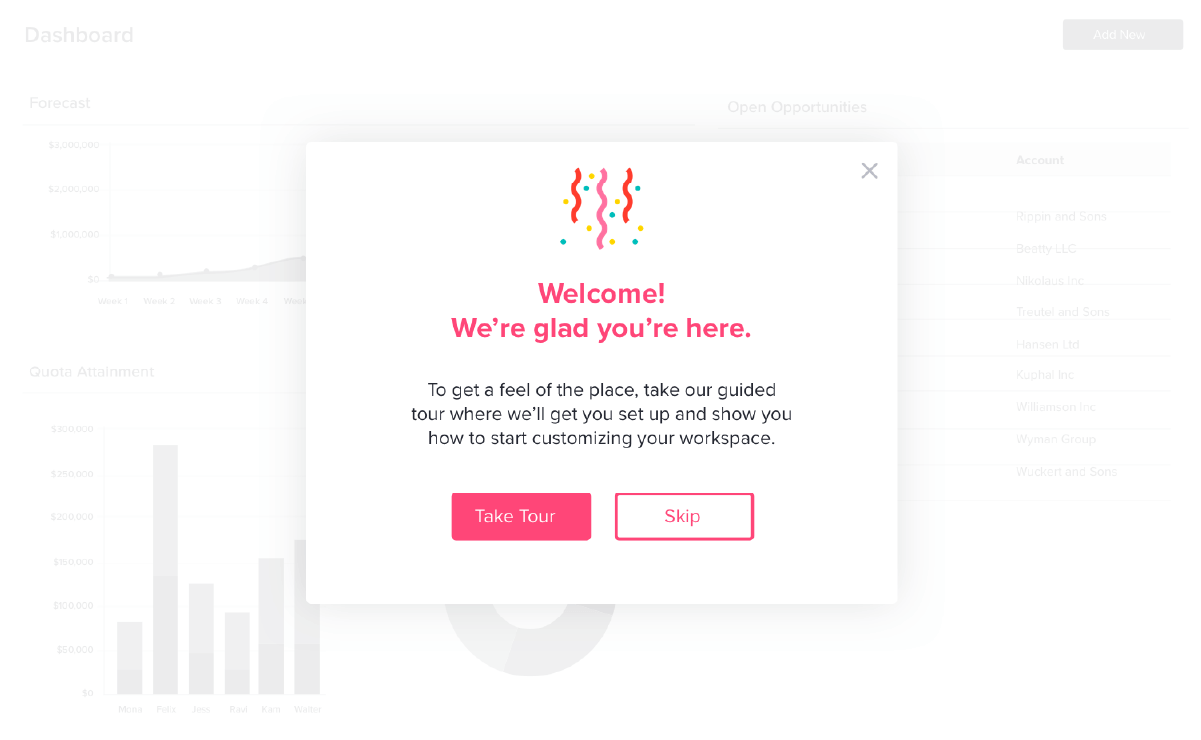
Automatically: These guides will appear automatically when a user arrives on the anchor page. This type of activation is best used for brand new users, so they have a welcome message immediately upon first login.
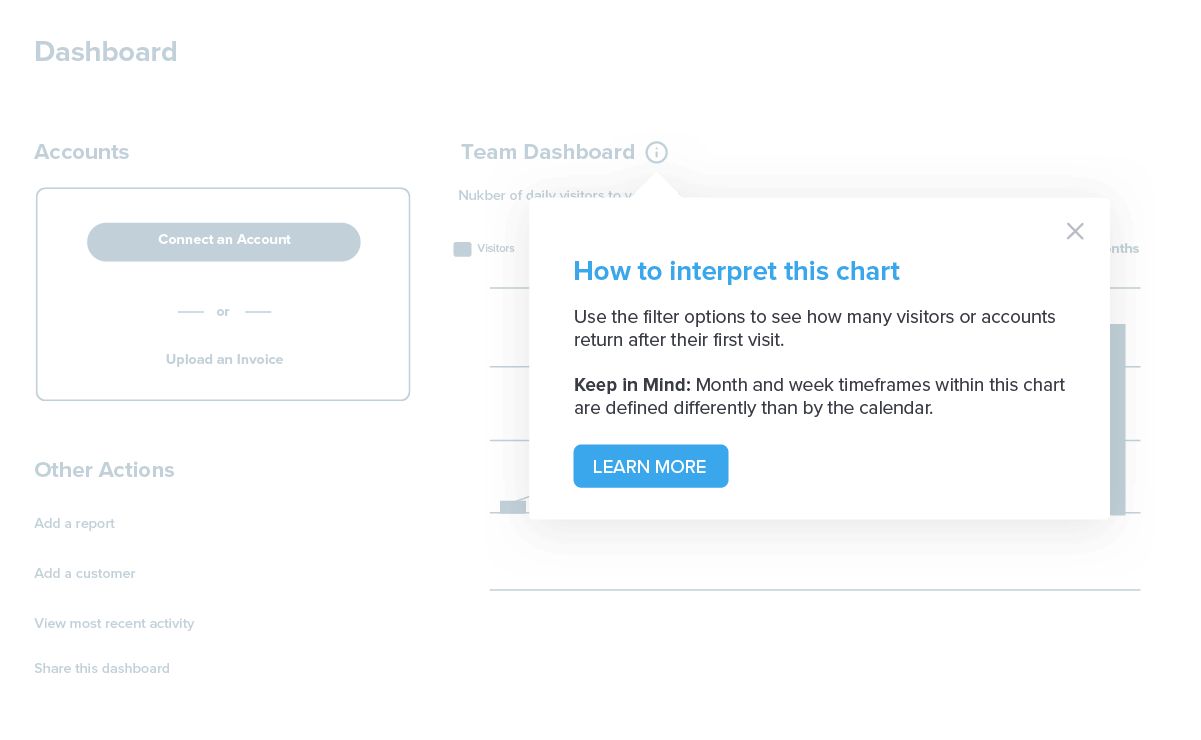
Badge: These guides appear after a visitor clicks or hovers over a badge icon. This activation method is best for passive tooltips that you want users to be able to access only if needed. Using badge activation can also help avoid cluttering the user interface.
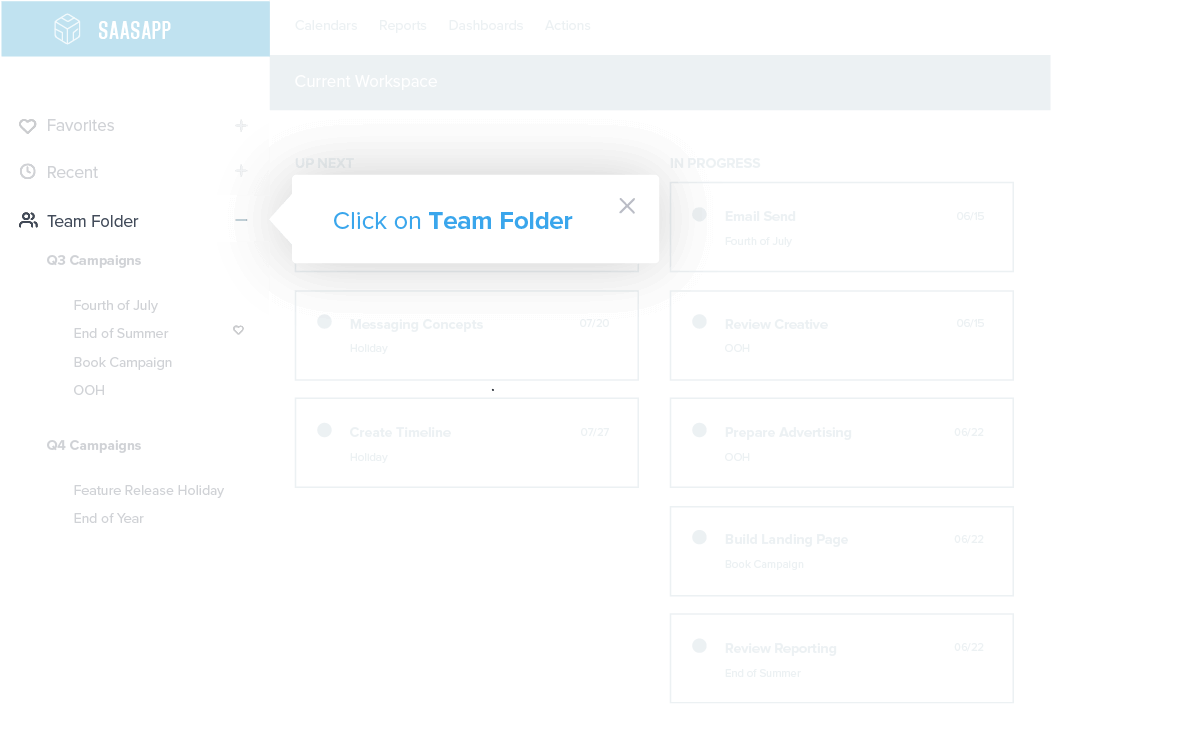
Target element: These guides will activate when a user clicks on the feature or page the guide is anchored to. These are best used when you want to train on a particular feature or page.
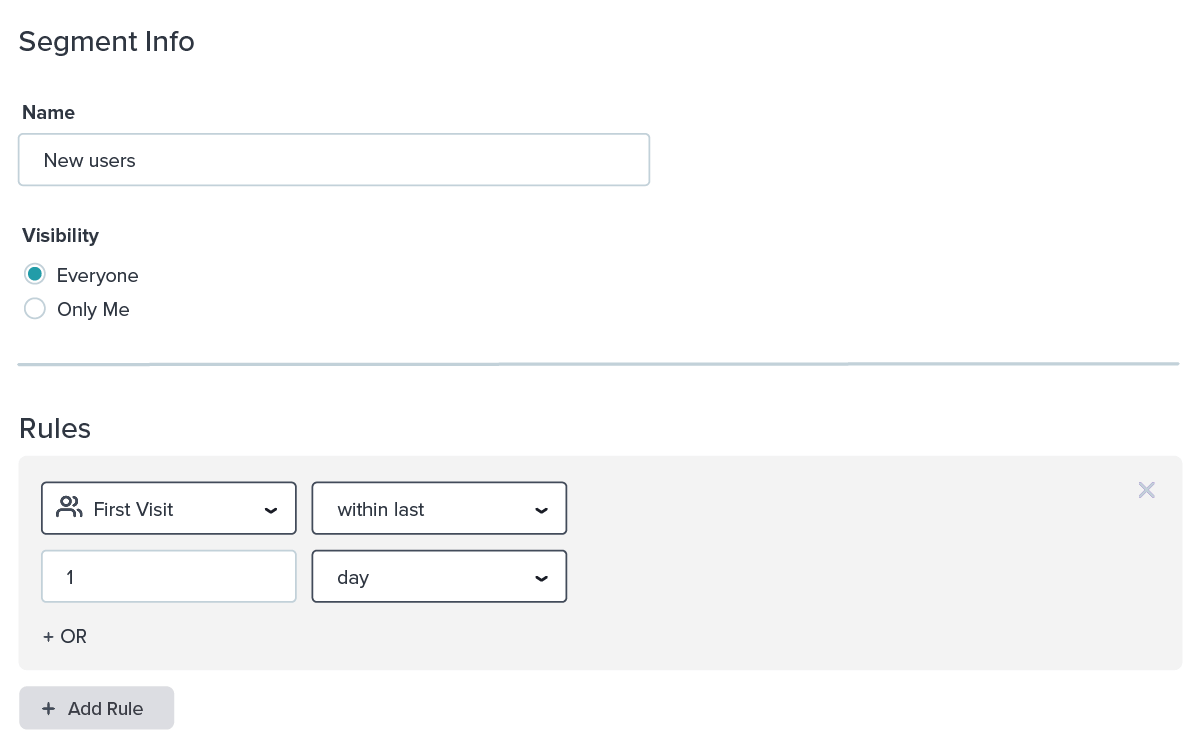
Step 5: Guide segmentation
Build and select the new user segment you want to deploy the walkthrough to
Applying a segment to the guide will ensure that the walkthrough only reaches the users it’s relevant to: new users. As you get more experienced building onboarding flows and begin to understand the benefit of nuance, segmentation will be the secret weapon that allows your in-app training to become increasingly personalized to the user.
Segments can be built off of a variety of different metadata or product usage data points, but as a start, you’ll build your new user segment off of the “visitor first visit” metadata field.
PRO TIP
Create a segment for users within your own company to help with new employee product training.
Step 6: Guide publishing
Schedule the guide and publish
Finally, if there’s a limited time during which you’d like to run the guide in your application (for example, if you’re testing your first onboarding flow to a subset of users), you should schedule start and end dates for your walkthrough.
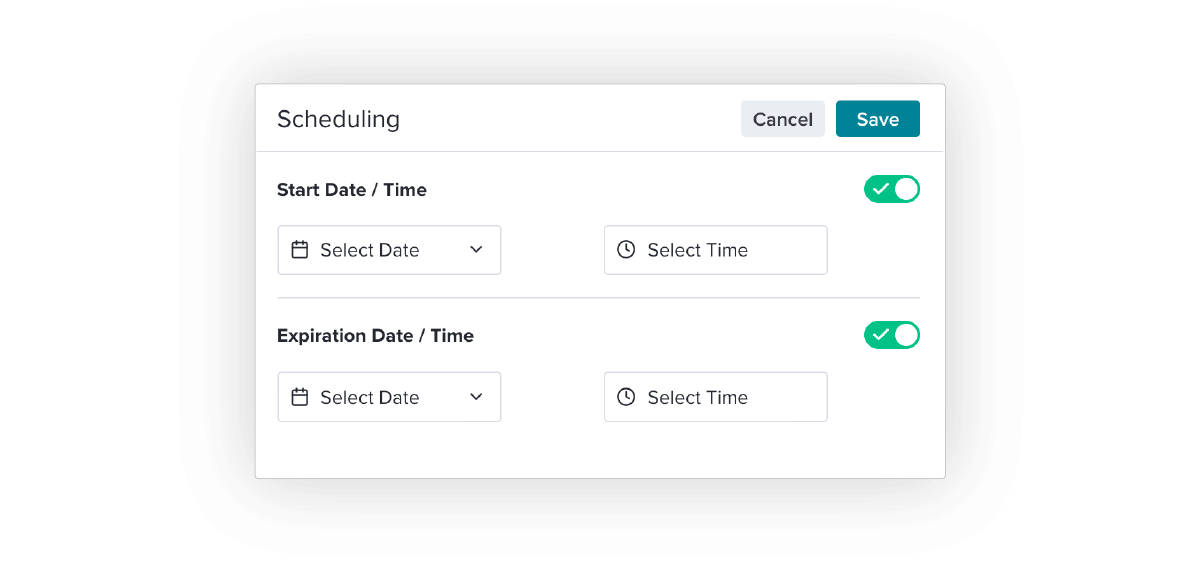
From there, you can preview and publish your finished guide to your new users.
What comes next
Once you master the basics of building in-app onboarding flows, the options of what you can do with in-app engagement become limitless. As you progress along your journey with Pendo, you can experiment with more advanced behavioral triggering, personalization, and knowledge base tools to ensure you’re delivering the right message at the right time — all without engineering requirements.
In part two, we’ll dig into using product data to optimize the onboarding experience.